1 September 2026
Drummers: Cymbal Stack Setup for Repeatable Tone with 6 Combos
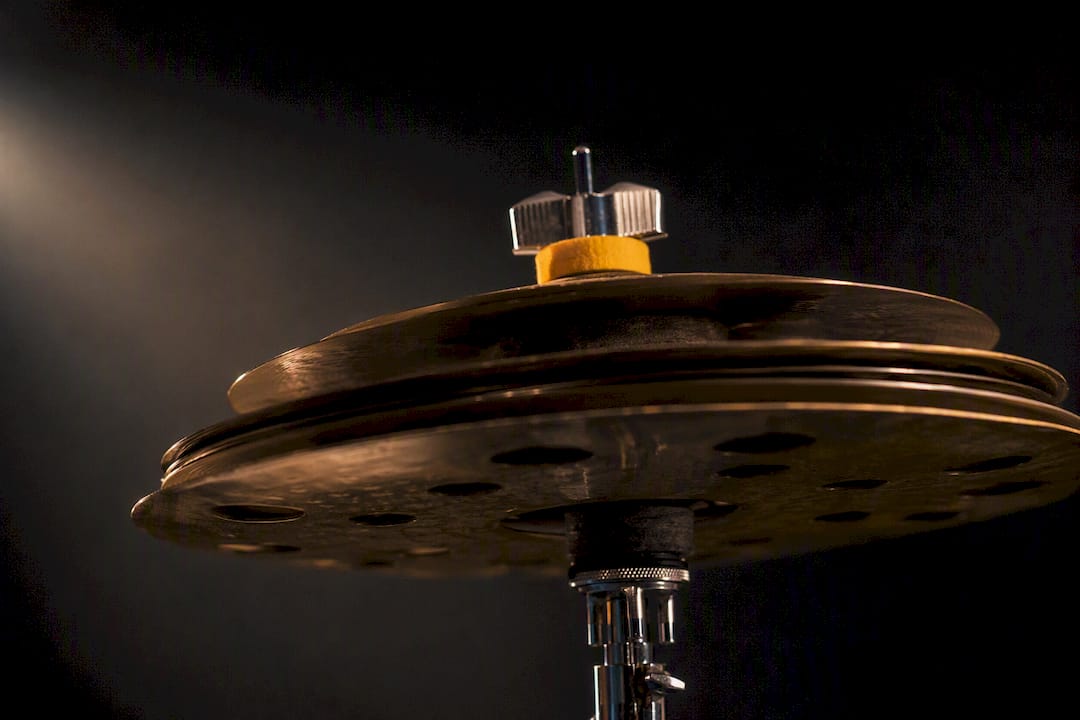
Drummers: Cymbal Stack Setup for Repeatable Tone with 6 Combos
For a reliable cymbal stack setup, mount a smaller splash or FX cymbal loosely on top of a larger crash or china, keep the wingnut just barely snug, and angle the pair toward you. That combination gives you a short, trashy attack with fast decay instead of a ringing crash. Skip the felt sandwich only if you enjoy metal-on-metal clank, and never crank the wingnut tight enough to stop the top cymbal from moving.
TL;DR:
- Use loose, barely snug wingnuts with a small splash or FX cymbal on top of a larger crash for trashy, quick-decay sounds without ringing.
- Choose specific hardware like nylon sleeves, felts, rubber spacers, and spiral stackers to prevent rattles and ensure proper cymbal interaction.
- Pair small splash sizes with larger crashes for predictable, bright accents and use mismatched alloys or hole patterns to alter timbre intentionally.
- Fine-tune sound by adjusting strike points, felt thickness, and tension, listening for more response or dryness in recorded or live settings.
- Prioritize using cheap or damaged cymbals as top pieces for experimentation, reserving expensive cymbals for bottom positions to reduce wear.
Table of Contents
- Cymbal Stack Setup: The Hardware You Need Before You Start
- What Are the Main Types of Cymbal Stacks?
- How Do You Physically Set Up a Cymbal Stack Step by Step?
- Which Cymbal Sizes and Materials Pair Best?
- How Do You Fine-Tune a Cymbal Stack’s Sound?
- Will Stacking Cymbals Damage Them?
- Six Starter Combos Worth Trying Tonight
- An Expert Note From Temple of Sound
- Should You Build a Stack or Stick With Separate Cymbals?
- Where to Find Stack-Ready Cymbals and Hardware
- Sources
Cymbal Stack Setup: The Hardware You Need Before You Start
A cymbal stack lives or dies on hardware, not luck. Get the parts right and any two cymbals will interact the way you want. Get them wrong and you’ll fight rattle, buzz, or a stack that just sits there dead.
Start with the stand. A straight cymbal stand works fine for a single stack over your ride or crash position, but a boom arm gives you real control over the angle and reach, which matters more once you’re running two or three stacks around a kit. Boom arms also let you tuck a stack in tight without it colliding with a tom or your hi-hat pedal.
The parts that actually make the stack work sit on the cymbal post itself. You need:
- A nylon sleeve to keep the cymbal bell from touching bare metal
- Felt washers, top and bottom, sized to the post
- A spiral cymbal stacker if you want tool-free height adjustment between songs
- Rubber spacers for extra isolation on brighter or thinner top cymbals
- A wingnut with clean threads, because a stripped one will either never hold or clamp too hard
Retail guides consistently point toward spiral stackers or purpose-built matched stacks for players who don’t want to spend an afternoon guessing at combinations. They’re worth the small investment if you’re setting up stacks permanently rather than experimenting song to song.
Before you touch a wrench, build a small parts kit: two or three spare felts, an extra wingnut, a small screwdriver for tightening stand tilters, and a few precut felt slices in different thicknesses. That last item is what lets you voice a stack on the fly instead of digging through a drawer mid soundcheck.
What Are the Main Types of Cymbal Stacks?
Every stack falls into a handful of categories, and each one has a distinct job. Picking the right family first saves you from buying cymbals that were never going to sound the way you imagined.
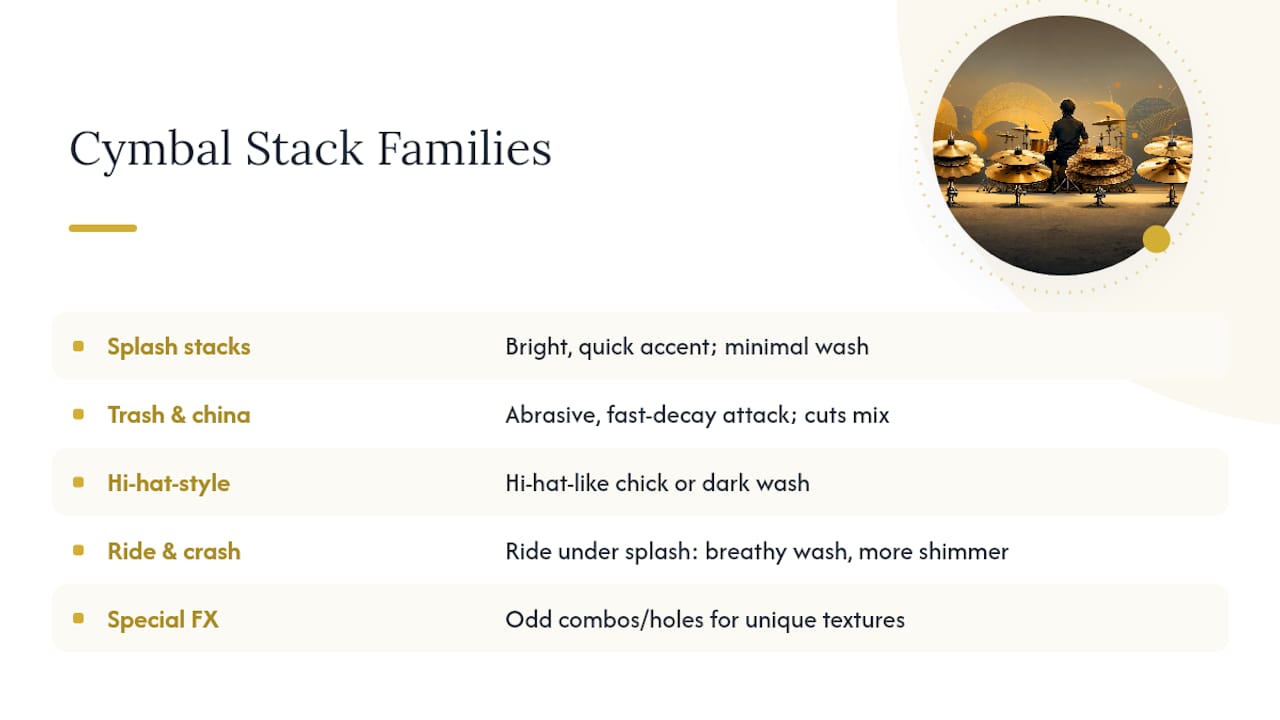
Splash stacks pair a small splash, typically 6 to 10 inches, on top of a larger crash or china. They deliver a bright, quick accent with almost no wash, which is why they show up so often in pop and EDM style grooves that want something close to a clap or rim shot sound. MusicRadar’s rundown of stack configurations covers this pairing as one of the most common entry points for drummers experimenting with stacks for the first time.
Trash and china stacks go the other direction. Two chinas, or a china under a smaller trash cymbal, produce an abrasive, fast-decay attack that cuts through a dense mix without ringing on. This is the classic metal and heavier EDM stack, and it’s also the type manufacturers build purpose-made products for. Meinl’s HCS Trash Stack line ships in 12, 14, and 16 inch sizes with holes cut into the top cymbal specifically to push the “trashiness” further than a standard pairing would.
Hi-hat-style stacks flip the usual logic. Mounting a smaller cymbal upside down, bell to bell, against a larger one gives you either a dark, breathy wash or a tight, closed “chick” sound depending on tension, closer to how a hi-hat behaves than a crash.
Ride and crash stacks, plus special FX stacks, cover everything else. Stacking a ride under a splash gives you a breathier wash with more shimmer than a straight splash-on-crash pairing. FX stacks built from odd combinations, holes, or non-matching materials exist purely to find a texture nobody’s heard from your kit yet. Community and vendor sources agree that material and profile shape the exact timbre far more than the raw dimensions do, so two “16 inch trash stacks” from different brands can sound nothing alike.
How Do You Physically Set Up a Cymbal Stack Step by Step?
Getting a stack from “two cymbals on a stand” to “an instrument that responds when you hit it” comes down to sequence and tension. Follow this order and you’ll skip most of the trial-and-error drummers waste hours on.
- Pick your stand and position first. Decide whether the stack sits on a dedicated boom, replaces a second crash spot, or mounts above your ride. Set the reach so you’re not twisting awkwardly mid-groove.
- Order the cymbals by size and weight. The smaller, lighter cymbal almost always goes on top. This is the single most repeated piece of advice across drummer forums, and for good reason: a heavy bottom cymbal gives the top piece something to bounce and rattle against instead of just sitting flat.
- Layer the hardware in sequence. Nylon sleeve on the post, felt washer, bottom cymbal, another felt or rubber spacer, top cymbal, top felt, then the wingnut.
- Tighten the wingnut finger-tight, then back it off slightly. This is the rule that trips up most beginners. A stack needs to vibrate against itself to make its signature sound. Clamp it down like a normal crash and you’ll choke the whole thing into a dull thud.
- Angle the stack toward your playing position and check clearance so you can still reach a crash or tom on the follow-through of your stroke.
Pro Tip: If your stack sounds completely dead when you hit it, the wingnut is too tight nine times out of ten. Loosen it a quarter turn at a time until the top cymbal starts singing against the bottom one, rather than assuming the cymbals themselves are a bad pairing.
If you’re getting no activation at all, the top cymbal probably isn’t making contact, check that the felt or spacer isn’t too thick and lifting it clear. A choked, papery sound almost always means over-tightening. Excessive rattle or buzz, on the other hand, usually means the wingnut is too loose or a felt has slipped out of position entirely.
Which Cymbal Sizes and Materials Pair Best?
Not every crash and splash you own will play nicely together, and pairing rules exist because bells and bows physically need to make contact in a consistent way to activate.
Bell profile matters more than most drummers expect. Two cymbals with similar bell shapes sit against each other cleanly across their whole surface, which gives you an even, predictable response every time you strike. Mismatched profiles, one with a pronounced bell and one nearly flat, tend to rock and clank instead of ring together.
Size rules of thumb help, but they’re starting points, not laws:
- A smaller splash on a larger crash is the standard “instant clap” pairing.
- A medium-sized china under a larger crash gives you a heavier trash sound with more body.
- Top cymbals close in size to the bottom cymbal risk overhanging awkwardly and catching the stick on off-angle hits.
Material interaction is where things get interesting. Bronze-on-bronze stacks tend to blend, producing a more unified wash, while a brass cymbal against a bronze one often creates a harsher, more separated attack because the two alloys resonate at different rates. Holes and cutouts, like those found on purpose-built trash stacks, increase air movement between the plates and push the sound further toward hiss and less toward tone.
A large share of the advice circulating in drummer communities boils down to one habit: use your cheap or damaged cymbals as top pieces first. Forum consensus on stacking treats budget cymbals as the standard tool for trial and error, since a thin, inexpensive splash that sounds harsh alone might be the perfect trashy top for a stack, no financial risk involved.
How Do You Fine-Tune a Cymbal Stack’s Sound?
Once a stack is mounted and working, the real craft starts. You don’t need new cymbals to change the sound. You need to change where and how you hit the ones you already have.
Strike point shifts attack versus wash instantly. Hit closer to the edge and you get more wash and sustain; move toward the bell and the attack sharpens into a tighter click. Changing your stick angle, glancing versus a direct downstroke, does something similar, since a glancing hit lets the top cymbal move more freely against the bottom one.
Felt slices are your sustain dial. Add a thicker slice between the cymbals and you introduce more air, more hiss, and a longer tail. Pull the felt out entirely for a shorter, drier, almost clipped sound, closer to what most trash-stack recordings actually use.
- Loosen the wingnut a hair for a livelier, more responsive stack
- Tighten it slightly if the sound feels too loose or clattery for the mix
- Try a rim shot or bell strike on the top cymbal for a completely different texture than a standard center hit
Pro Tip: Record ten seconds of the same stroke at three wingnut tensions and listen back. The difference between “finger-tight” and “finger-tight plus a quarter turn” is bigger than most drummers assume until they hear it side by side.
Studio and live voicing genuinely differ. In a room, you want a bit more decay so the stack reads through the mix; on a stage with overheads picking up cymbals, a shorter, tighter voicing usually translates better once it hits the PA. If you’re mixing stacks with overhead mics, placement of the overhead pair changes how much of that trashy decay actually gets captured, so it’s worth adjusting felt and tension after you’ve heard the stack through the overheads, not just standing next to the kit.
Will Stacking Cymbals Damage Them?
Stacking puts cymbals in contact with metal, felt, and each other in ways a standalone crash never experiences, and that contact adds up over time.
The biggest risk is an inverted china sitting bell-down against another cymbal’s edge. That configuration concentrates wear right where the metal is thinnest, and repeated hard contact there is a common cause of hairline cracks starting at the edge. Reddit’s drummer community and multiple forums agree that thin protective felt or rubber spacers between plates cut down on marking and slow that wear considerably.
A few habits protect your cymbals without costing you any sound quality:
- Use a felt slice, not bare metal-on-metal contact, in every stack you build
- Keep your best or most expensive cymbal on the bottom, away from direct repeated strikes
- Retire a cracked cymbal to stack duty instead of scrapping it. A hairline crack that would ruin a crash’s tone often disappears into a trash stack’s sound anyway
- Wipe down contact points after heavy use, since grime buildup between plates changes the resonance over weeks
Six Starter Combos Worth Trying Tonight
You learn stacking by ear, not by reading. These six pairings cover most of what you’ll want across genres, and every one of them is worth recording a quick phone clip of so you can compare before-and-after when you adjust tension or felts.
| Combo | Sound | Best For |
|---|---|---|
| small splash on 16" crash | Bright, clap-like accent | Pop, EDM |
| 10" splash on larger crash | Fuller clap with more wash | Indie, funk |
| 14" china under 16" crash | Heavy, cutting trash | Metal, hard rock |
| Two 16" chinas stacked | Dense, aggressive wash | Metal, industrial |
| Small hat inverted on larger crash | Dark chick or breathy close | Jazz, ambient textures |
| 10" splash on a ride cymbal | Airy shimmer with long tail | Cinematic, post-rock |
The splash-on-crash pairings are the easiest entry point since almost any spare splash works and the result is predictable. The double-china and inverted hi-hat combos take more fiddling with tension and felts before they sound intentional rather than accidental.
An Expert Note From Temple of Sound
Temple of Sound distributes handcrafted cymbals built for exactly this kind of experimentation, alongside the stands, felts, and stacking hardware that make setup painless. If you’re choosing pairings, the cymbal pack selection guide walks through compatibility, and the splash sizing breakdown and cymbal care guide both cover ground this article touches on in more depth.
Should You Build a Stack or Stick With Separate Cymbals?
Stacks trade access and longevity for texture you can’t get any other way. If your kit is already crowded or you’re playing one style night after night, a couple of solid separate cymbals often serve you better than a stack you rarely reach for cleanly.
Build a stack when you’re chasing a specific sound a single cymbal can’t deliver, and start with cheap, spare cymbals before committing your good ones. Experiment in small tension changes, not big swaps.
— Will
Where to Find Stack-Ready Cymbals and Hardware
Building a stack that actually sounds intentional starts with cymbals designed to interact well together, not just whatever’s sitting in your gig bag. Temple of Sound stocks handcrafted cymbals from Alchemist Cymbals alongside the felts, spiral stackers, and rubber spacers covered above, so you’re not hunting three different retailers to assemble one stack.

Browsing by category makes this easier. Temple of Sound’s range covers splash, china, and crash cymbals in the sizes this guide recommends for starter combos, plus curated cymbal packs built with pairing compatibility already worked out. If you’re unsure which crash or ride will actually sit right under a splash, the cymbal pack guide breaks down profile and size matching before you spend a cent. Trade accounts and custom orders are available for retailers and drummers who want something outside the standard lineup.
Head to the Temple of Sound shop to browse current cymbal packs and stacking hardware, or reach out directly if you want advice on a pairing that isn’t covered here. Custom advice costs nothing, and it beats guessing with cymbals you can’t return.
Sources
- Take in the trash: check out some leading cymbal stacks, plus how to make your own | MusicRadar
- How To Stack Cymbals & Best Cymbal Stacks Upd. 2025 | PrimeSound
- How to make a cymbal “stack”? | DrumForum
- How to Stack Cymbals for New Sounds - InSync | Sweetwater