14 September 2026
Under $15 Cymbal Keyhole Repairs for Drummers You Can Do in Minutes
Under $15 Cymbal Keyhole Repairs for Drummers You Can Do in Minutes
Yes, you can stop a cymbal keyhole from getting worse, and you don’t need a workshop to do it. A grommet, a Grombal sleeve, or a length of soft tubing over the bell hole will halt the wear immediately for a few dollars. If the cymbal is a vintage piece or a favorite you’d never replace, professional restoration through micro-welding or a repair slug can rebuild the metal itself. Either path beats ignoring it because a keyhole only grows.
TL;DR:
- Installing a rubber or nylon grommet, Grombal, or tubing over the stand rod can effectively prevent further keyhole growth at minimal cost.
- Proper sizing and fit are crucial, as an oversized or tight-fitting grommet may mute resonance or cause mechanical issues with clutches.
- Professional restoration with micro-welding is suitable only for valuable or vintage cymbals, typically costing between $60 and $140.
- Regular maintenance, such as replacing worn sleeves and avoiding over-tightening, is the most effective way to prevent keyholing.
- DIY patches are best for early-stage damage or budget cymbals, while extensive cracks or deformation warrant professional repair or replacement.
Table of Contents
- What Is Cymbal Keyhole Repair, and Which Fix Do You Need?
- Common DIY Fixes: Grommets, Grombal, and Tubing Sleeves
- How Do You Install a Grommet or Tubing Sleeve?
- Professional Restoration: Slugs, Epoxy, and Micro-Welding
- Preventing Keyholing Before It Starts
- Should You Repair, Restore, or Retire the Cymbal?
- What Temple of Sound Thinks About Keyhole Repairs
- Get the Parts That Stop Keyholing for Good
- Sources
- FAQ
What Is Cymbal Keyhole Repair, and Which Fix Do You Need?
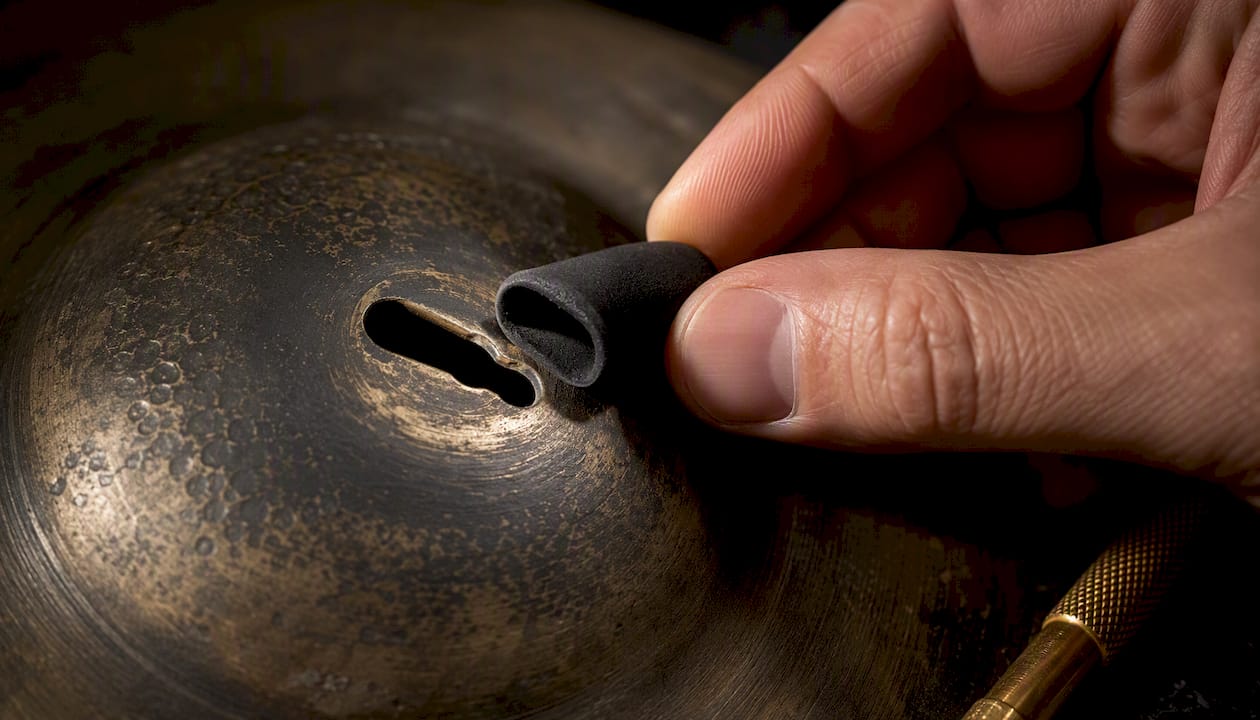
A cymbal keyhole is the elongated, teardrop-shaped gouge that forms at the center hole where the metal rubs against a stand rod or clutch shaft. It happens gradually: the stock plastic sleeve wears thin, then disappears, and bare metal starts grinding against bare metal every time you play. Once that abrasion starts, it does not stop on its own, and the hole widens with every session until the cymbal wobbles or cracks outward from the center.
Cymbal keyhole repair covers two very different jobs. The first is stabilization, which is cheap, fast, and something almost anyone can do at home with basic parts. The second is restoration, which rebuilds lost metal and belongs to a specialist with the right equipment. Most drummers only need the first one. A small number of cymbals, the ones with real collector or sentimental value, justify the second.
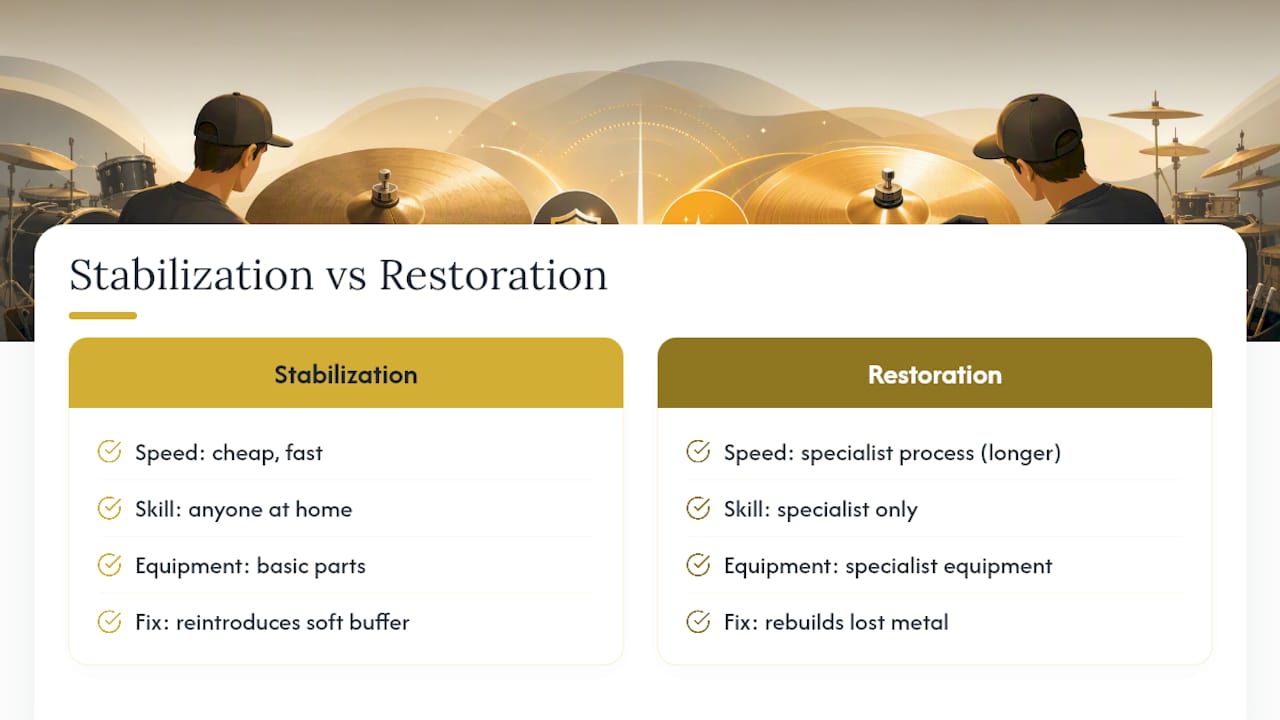
The mechanism matters here because it tells you what actually fixes the problem. Metal-on-metal contact from a worn sleeve is the root cause of keyholing, so any repair that does not reintroduce a soft buffer between the cymbal and the hardware is just a temporary patch. That is why the DIY fixes below all revolve around one idea: put something soft back between the metal and the metal.
Common DIY Fixes: Grommets, Grombal, and Tubing Sleeves
The best-known DIY method is adding a grommet or soft protector to the bell hole, and it remains the go-to fix among gigging drummers for good reason: it is reversible, cheap, and takes five minutes.
A grommet or Grombal is a two-piece rubber or nylon insert that sits inside the cymbal’s center hole, one half on top, one half underneath, snapping together through the hole. It spreads the contact point across a wider, softer surface instead of one sharp metal edge, which stops the keyhole from growing wider or deeper.
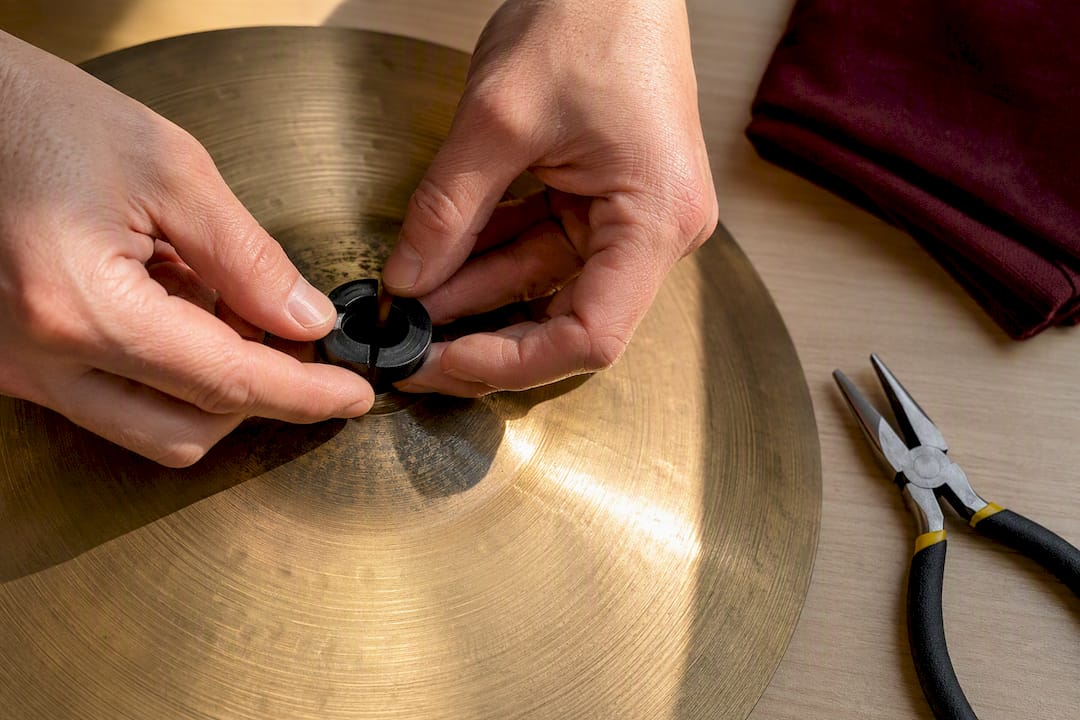
Soft tubing works on the same principle from the other direction. Instead of lining the cymbal hole, you slide a short length of aquarium tubing or PEX pipe over the stand rod itself, effectively rebuilding the cushion that the factory sleeve used to provide.
Here’s how the common options stack up:
- Rubber or nylon grommets: roughly $1 to $8 for a multi-pack, easy snap-in install, minor risk of muting the cymbal’s resonance if the fit is too tight.
- Grombal-style two-piece inserts: closer to $5 to $15 per cymbal, designed specifically for this job, generally the most secure fit of the group.
- Aquarium or PEX tubing on the stand rod: pennies per foot, requires cutting to length, occasionally interferes with a hi-hat clutch if the diameter runs too large.
- Replacement nylon stand sleeves: a few dollars per pair, restores the stand to factory spec, does nothing for a hole that has already keyholed.
None of these fixes will over-deaden a cymbal when sized correctly. Drummers on long-running forum threads report that a properly fitted grommet is essentially inaudible once you’re playing at normal volume.
Pro Tip: Buy two sizes of grommet before you commit. Cymbal center holes vary more than you’d expect between brands, and a snug fit matters more than the material it’s made from.
How Do You Install a Grommet or Tubing Sleeve?
You need a short list of parts and tools before starting: a grommet or Grombal kit sized to your cymbal, a small hammer and anvil or block (only for two-piece metal grommets), PEX or aquarium tubing if you’re going that route, a set of fine files, rubbing alcohol, and a spare stand sleeve.
Installing a two-piece grommet:
- Clean the cymbal’s center hole with rubbing alcohol to remove grease and grime.
- Measure the hole diameter with calipers or a drill bit set, and pick the closest matching grommet size, sizing up if you’re between two options.
- Test-fit both halves without crimping to confirm they seat flush on both sides of the bell.
- Press the two halves together by hand, then use light hammer taps on an anvil block if the kit calls for crimping.
- Wipe away any residue and test-fit the cymbal on a stand before you gig with it.
Installing a tubing sleeve on the stand:
- Remove the old, worn sleeve from the stand rod completely.
- Cut a fresh length of PEX or aquarium tubing about a quarter inch longer than the felt stack it will sit under.
- Slide the new tubing over the rod, then rebuild the felt and cymbal stack in order.
- Check that the cymbal tilts freely without binding, and that it does not sit metal-to-metal anywhere in the stack.
Before you finalize either fix, seat the cymbal on the actual stand you gig with and check hi-hat clutch clearance if it’s a top cymbal. A grommet that’s a hair too thick can jam a clutch shaft or dull the “chick” sound on closed hits. About 40% of keyholing damage on gigging cymbals happens at the top hi-hat position, where clutch rotation adds friction that a ride or crash never experiences. If you feel resistance, sand the grommet’s inner bore lightly with a fine file rather than forcing the fit.
Professional Restoration: Slugs, Epoxy, and Micro-Welding
When a cymbal is worth more than a quick patch, two professional-adjacent routes come up again and again in drummer communities.
The first is a repair slug, essentially a shaped washer or stainless-steel disc bonded into the worn hole with epoxy like JB Weld. Hobby restorers shape the slug to match the cymbal’s underside curvature, clamp it under mechanical pressure while the epoxy cures, then file and re-drill the center hole. It shifts the load away from the damaged metal rather than repairing the metal itself.
The second is micro-welding, an additive process that rebuilds lost material directly. Specialists like Tom Foote use pulse arc welders that limit the heat-affected zone, stitching new metal into cracks and worn holes without significantly altering the cymbal’s temper. Small center-hole restorations typically run about $60 to $140.
Standard shop welding torches are the wrong tool here. They spread heat far beyond the repair site and can soften the alloy across a much wider area, changing how the cymbal responds.
Before hiring anyone, ask:
- What welding equipment do they use, and is it a pulse arc micro-welder built for cymbals?
- Can they show before-and-after sound clips from past restorations?
- What’s the turnaround time and total price, including any re-lathing?
Preventing Keyholing Before It Starts
Maintenance beats repair every time, and the fixes are almost embarrassingly simple.
- Always run a felt above and below the cymbal, plus an intact nylon sleeve on the stand rod.
- Replace worn sleeves the moment you notice play or metal contact, not after the keyhole appears.
- Skip over-tightening the wing nut, and avoid steep tilt angles that concentrate pressure on one side of the hole.
- Rotate cymbals in your rotation occasionally so wear doesn’t concentrate on the same units.
- Upgrade to durable No Nuts sleeves or T-shaped cymbal savers on stands you use constantly.
- Keep two or three spare sleeves in your stick bag and check every stand before load-in.
Sleeves, felts, and regular hardware inspection prevent the metal-on-metal contact that causes keyholing in the first place, and drummers who never keyhole a cymbal usually aren’t doing anything exotic. They just replace a two-dollar sleeve before it wears through.
Pro Tip: Check your sleeves during string changes or before soundcheck. It takes ten seconds and it’s the single habit that prevents the most damage.
Should You Repair, Restore, or Retire the Cymbal?
Base the call on value, damage, and how you actually use the cymbal.
- DIY grommet or tubing: right for gigging cymbals, budget cymbals, or early-stage wear where the hole hasn’t distorted the bell shape yet.
- Professional restoration: worth it for vintage, discontinued, or artist-series cymbals where sound character and resale value matter.
- Retirement: the honest call when the keyhole has grown into a visible crack radiating outward, or when the bell itself has deformed.
Expect a properly fitted DIY fix or a repair slug to leave sound essentially unchanged in most community reports, though results vary with cymbal thickness. A DIY fix costs under $15 and takes minutes; professional restoration runs $60 to $140 and takes days to weeks depending on the shop’s backlog.
What Temple of Sound Thinks About Keyhole Repairs
Prevention wins every argument here. Templeofsound stocks the sleeves, felts, and cymbal accessories that stop keyholing before it starts, and our cymbal care and cleaning guide covers the maintenance habits worth building into your routine. If you’re weighing whether a cymbal’s value justifies professional restoration, that’s worth thinking through before you spend on either a DIY fix or a specialist.
— Will
Get the Parts That Stop Keyholing for Good
Many suppliers carry replacement sleeves, felts, and cymbal accessories that keep a hole from forming in the first place, at a fraction of what a restoration will eventually cost. Skip the guesswork on sizing and material, and grab parts built for the job rather than whatever’s left on a hardware store shelf.

If your cymbal has already gone past the point a sleeve can fix, reach out through Templeofsound and we’ll point you toward the right replacement parts or a restoration referral suited to the cymbal you’re trying to save. Browse the full range of stand hardware and cymbal accessories, and get your kit sorted before your next gig, not after the keyhole shows up.
Sources
FAQ
What Is a Keyhole in a Cymbal?
A keyhole is the elongated, teardrop-shaped wear pattern that forms at a cymbal’s center hole when a worn stand sleeve lets bare metal grind against the stand rod or clutch shaft.
How Do You Repair a Cracked or Keyholed Cymbal?
For a growing keyhole, install a grommet, Grombal, or tubing sleeve to stop further wear; for a crack or heavily worn center hole on a valuable cymbal, a specialist can rebuild the metal with micro-welding, typically for $60 to $140.
Can You Use WD-40 on Cymbals?
No. Oil-based lubricants like WD-40 can leave residue that dulls the cymbal’s tone and attracts grime, so stick to a soft cloth and mild cleaner made for cymbals instead.
Are Cracked Cymbals Worth Anything?
A cracked cymbal still has value, especially a vintage or collectible model, since professional micro-welding restoration can often rebuild the crack without significantly changing the cymbal’s sound or temper.
Does a Grommet Change How a Cymbal Sounds?
A properly sized grommet or Grombal has a negligible effect on tone in most cases, though an oversized or overly stiff fit can slightly dampen resonance near the bell.